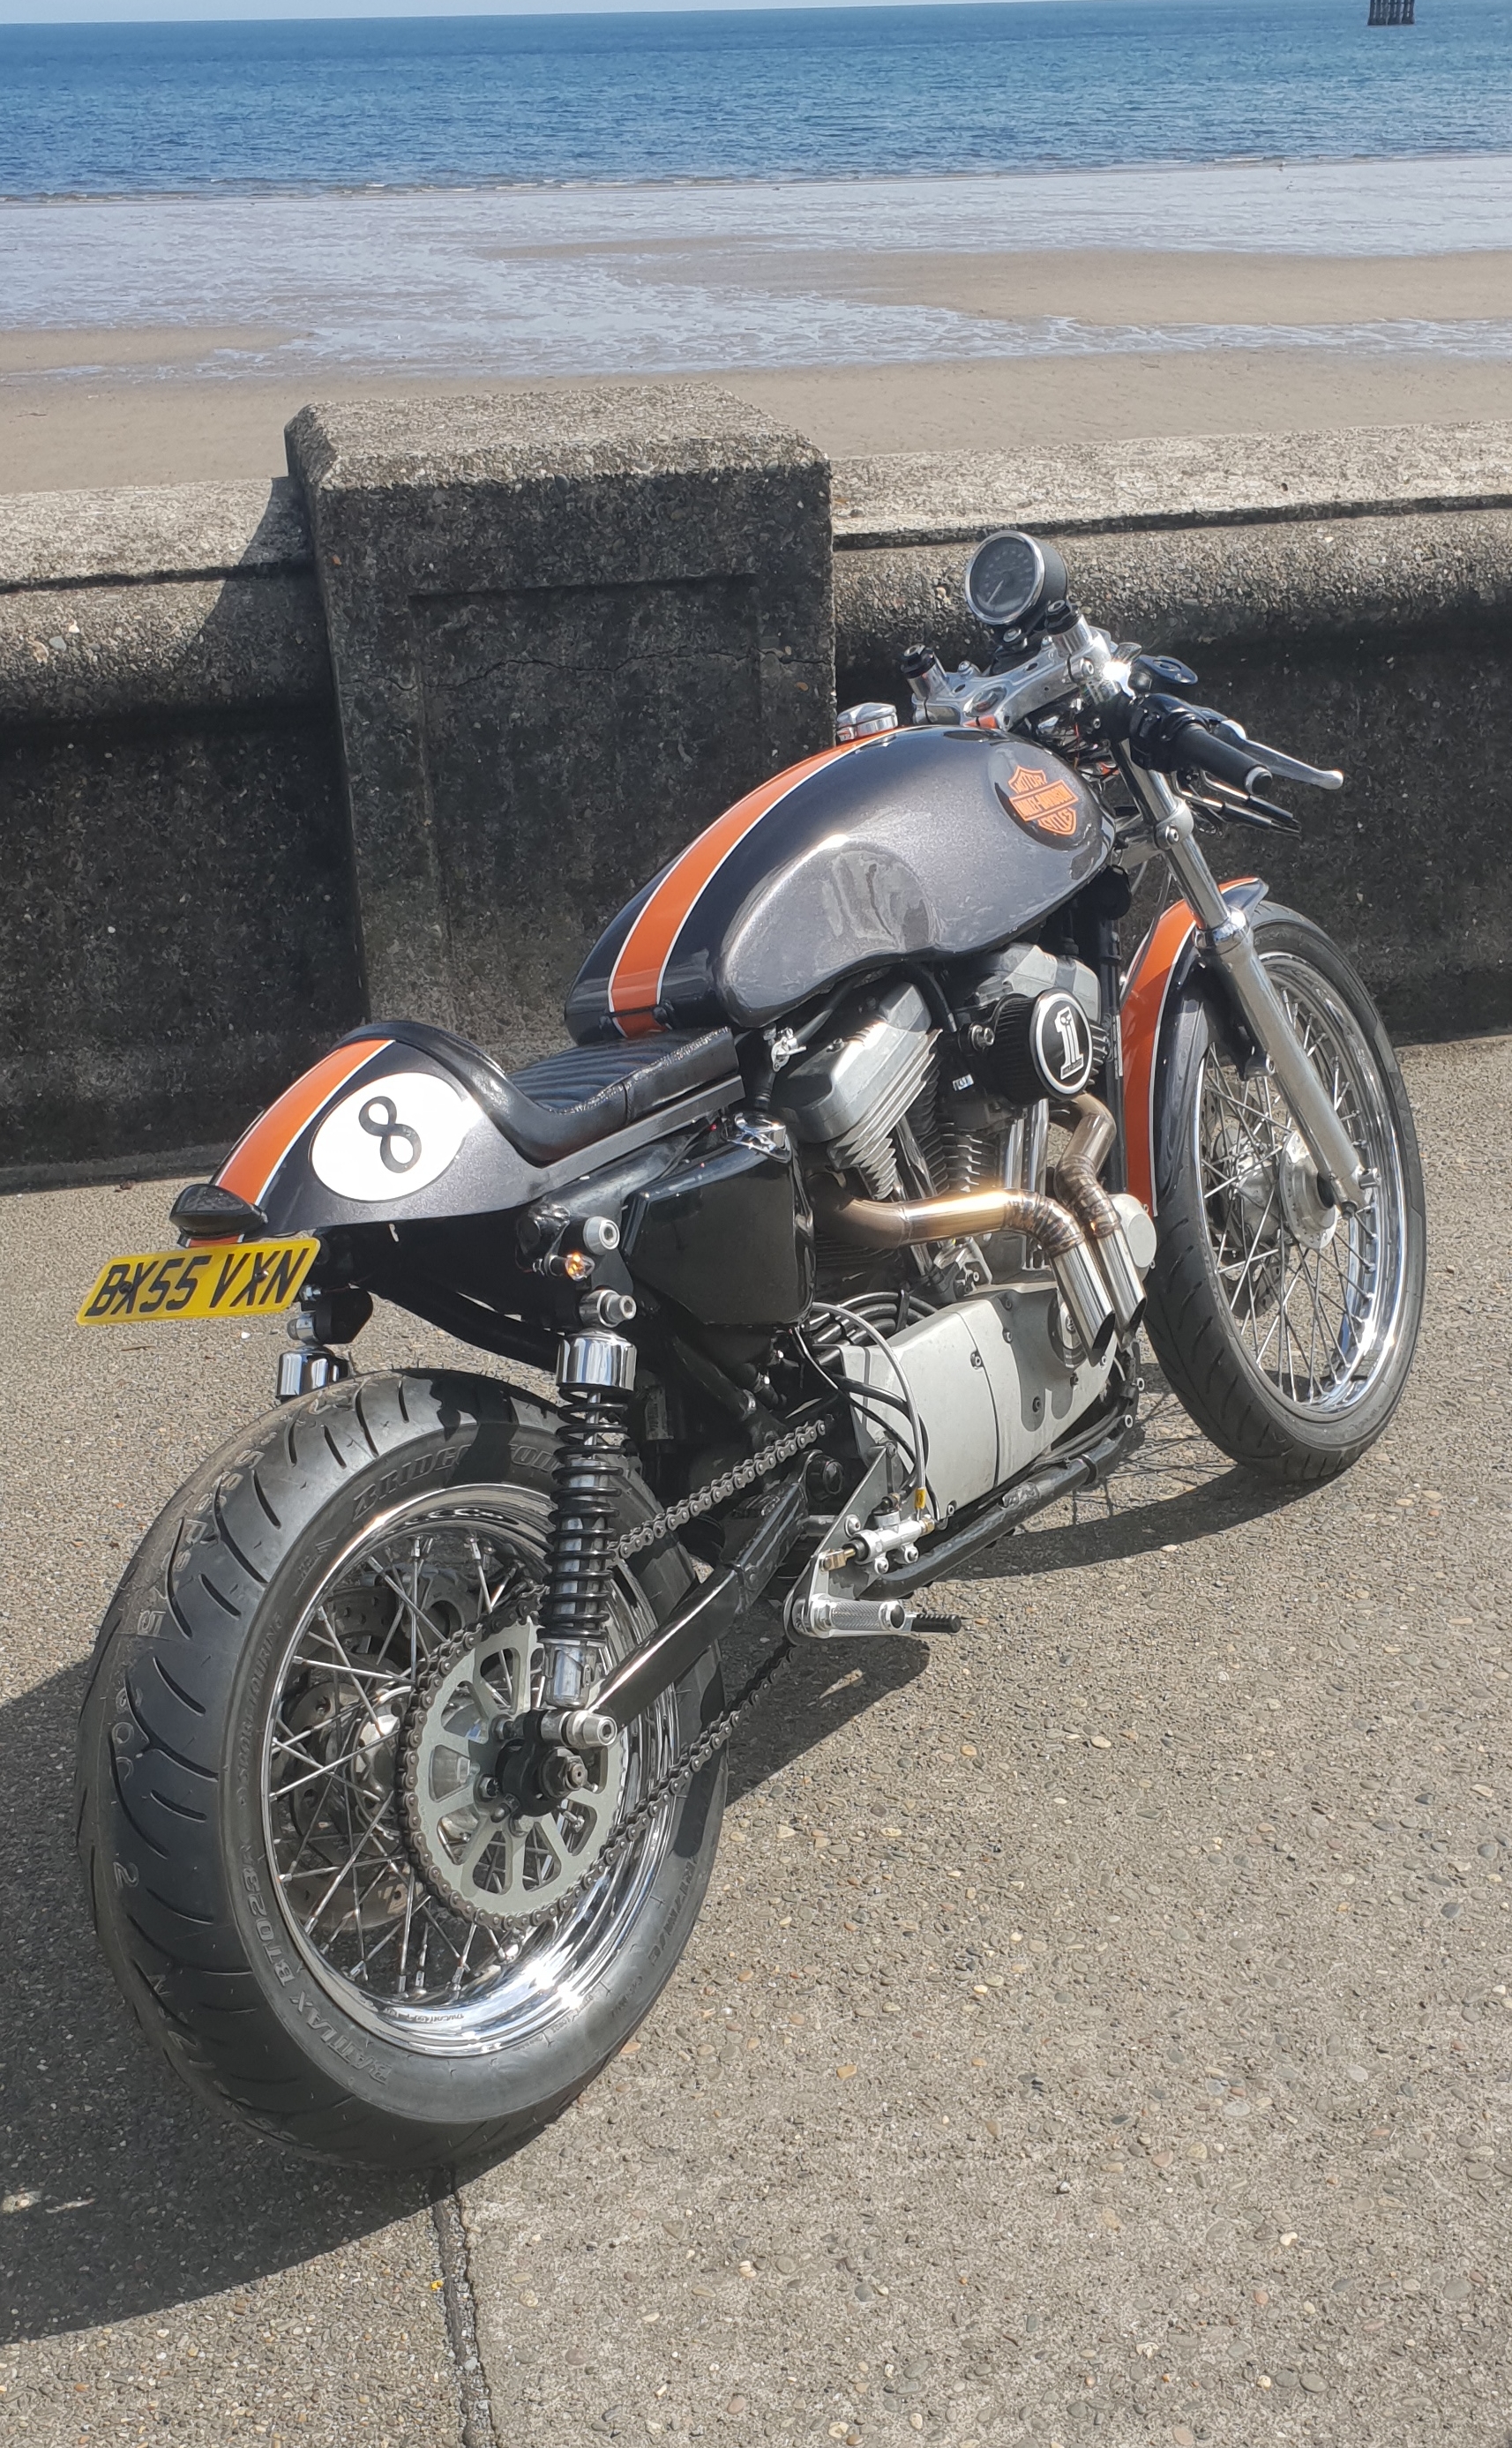
HARLEY XL883 CAFE RACER
Purchase
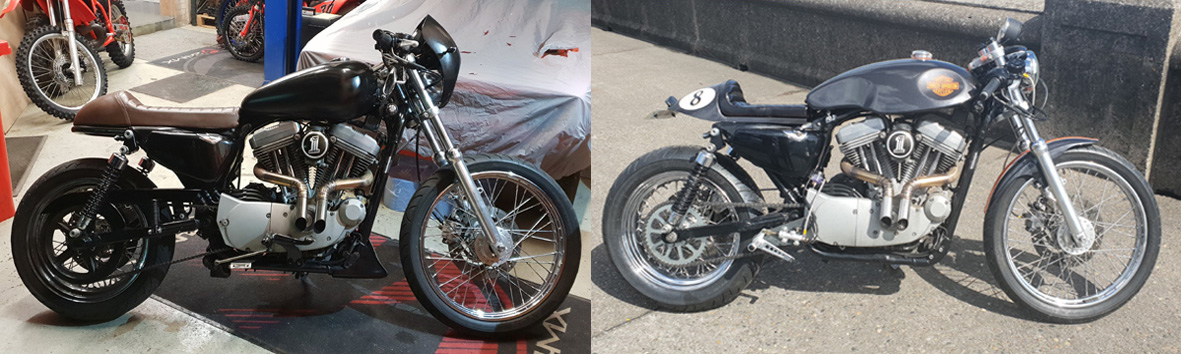
Despite having already sated my desire to build up a V-twin with my Virago, a partly cafe-raced 883 Harley came up on eBay at a reasonable price, and I couldn't resist the temptation to create a bike that would be very atypical of the brand. This coupled with the fact I'd come across a picture of exactly the kind of bike I had in mind, complete with a distinctive, low-profile, Lyta-style tank with sculpted recesses for forearms and knees (as typically fitted to classic British racers).
Inspection and Stripdown
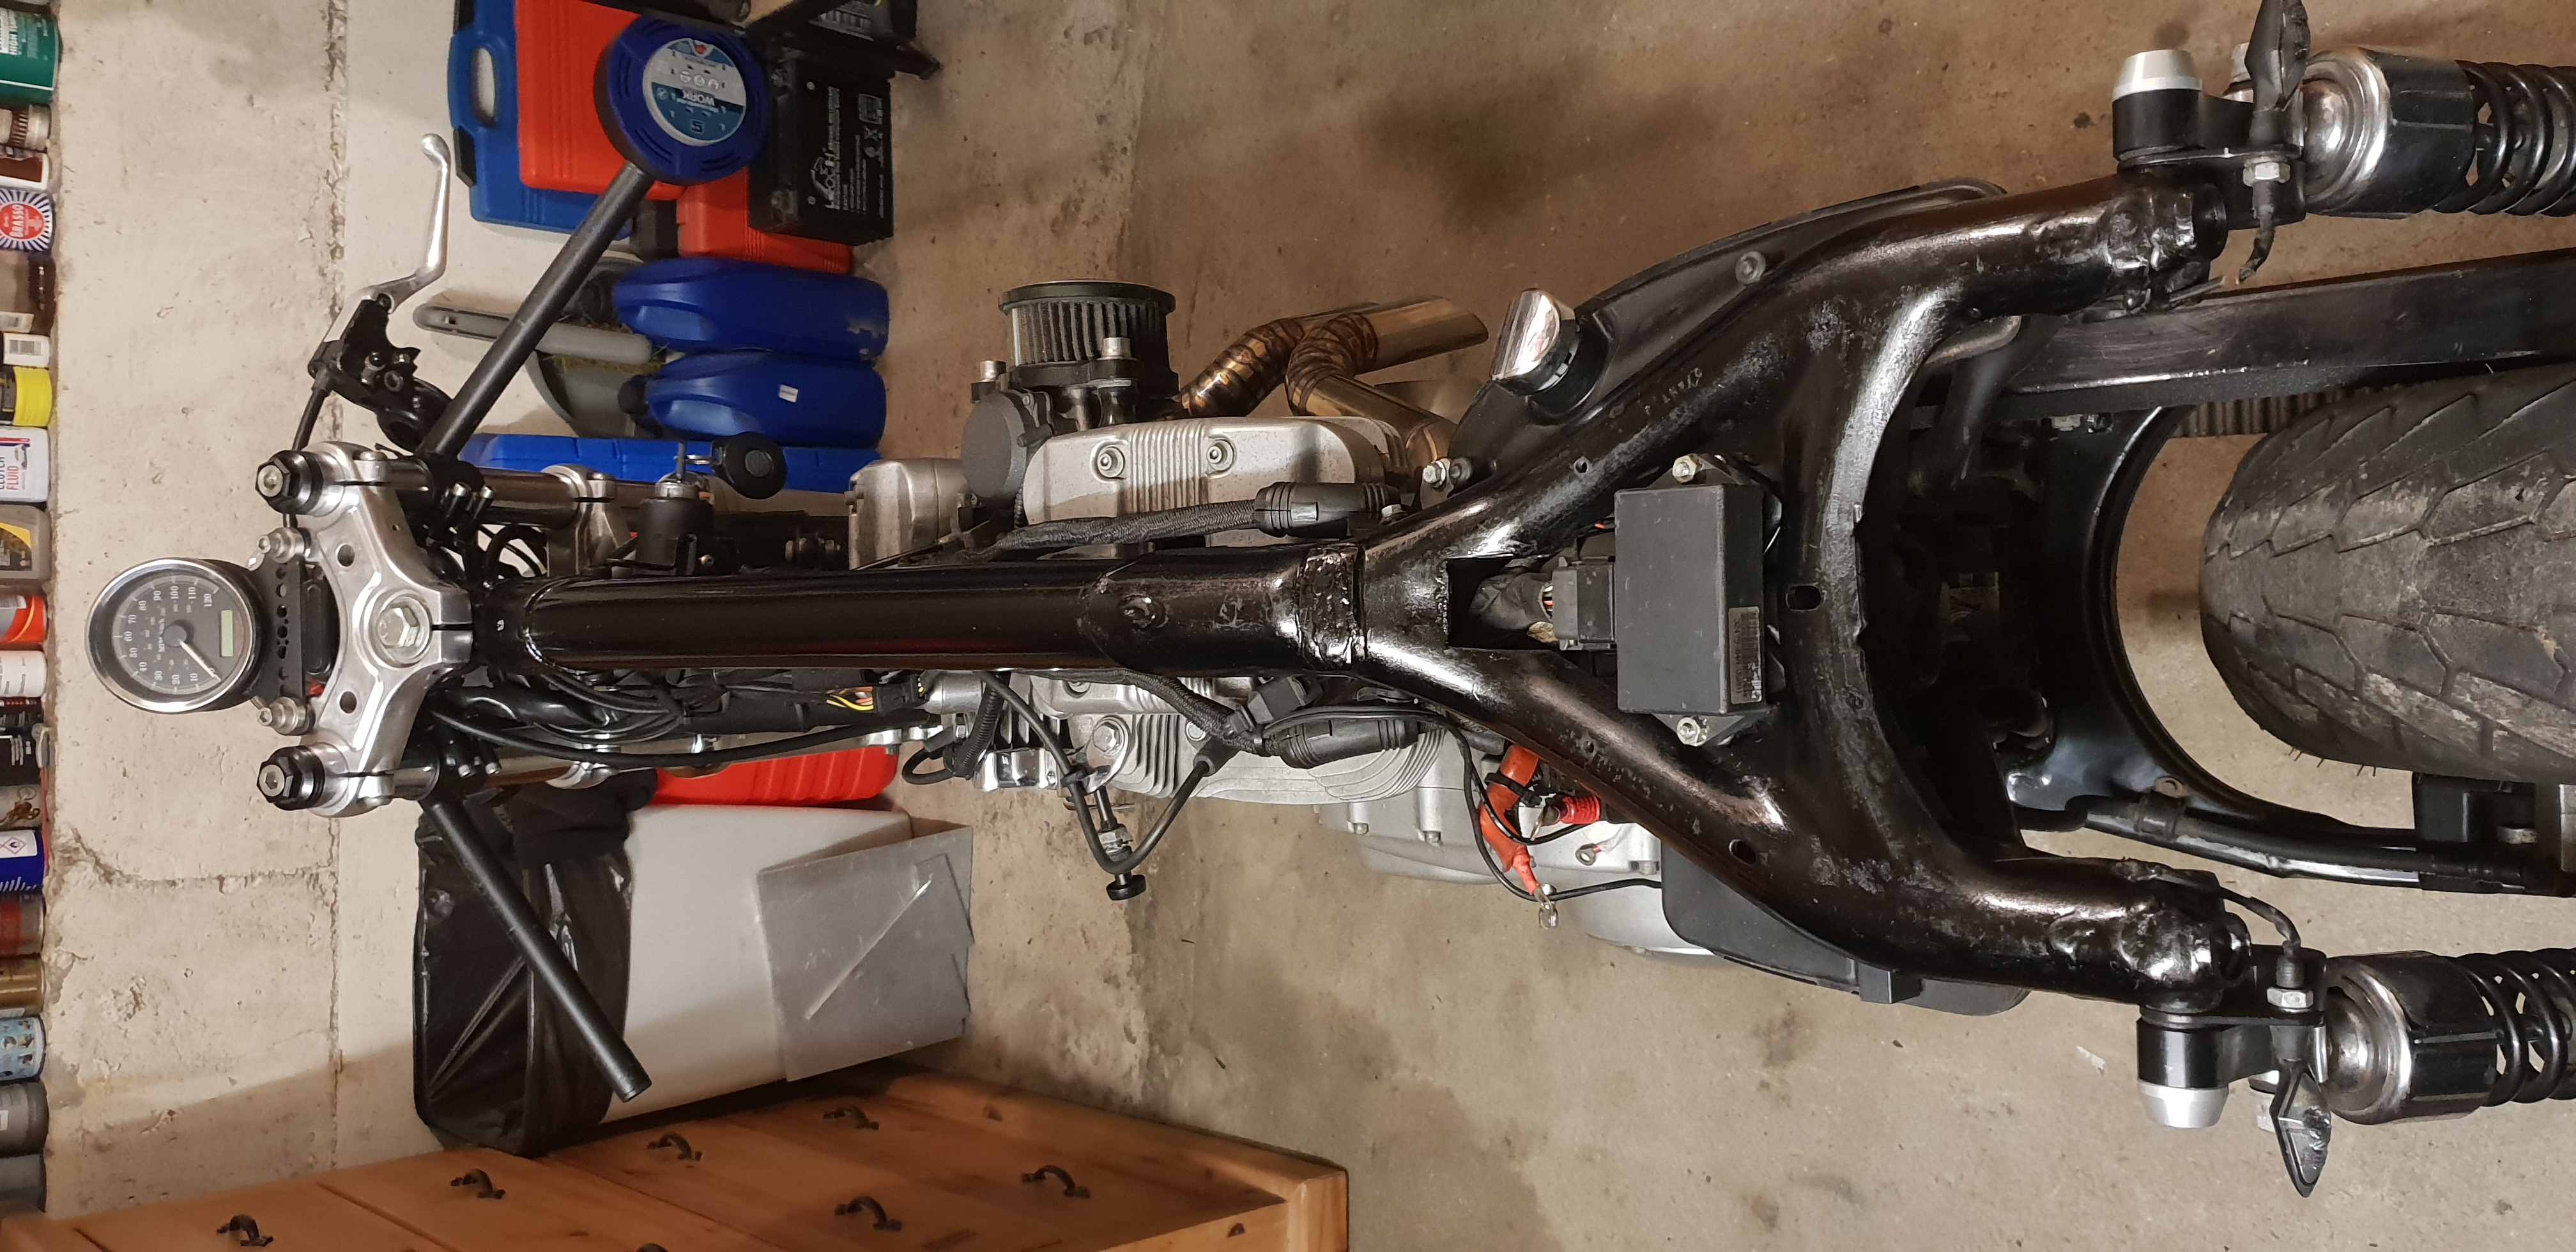
The bike was running well despite the stubby open pipes that made it sound like a WW2 Spitfire, so for once I would be concentrating primarily on the aesthetics. The tank, seat, handlebars, main and pillion footrests and controls, headlamp cowl, belly spoiler and chain guard were all removed, redundant frame lugs ground off, and the whole bike was generally cleaned and tidied. This revealed a fundamentally sleek, narrow motorcycle - not something you normally associate with a Harley.
Rearsets, Clipons and Brakes
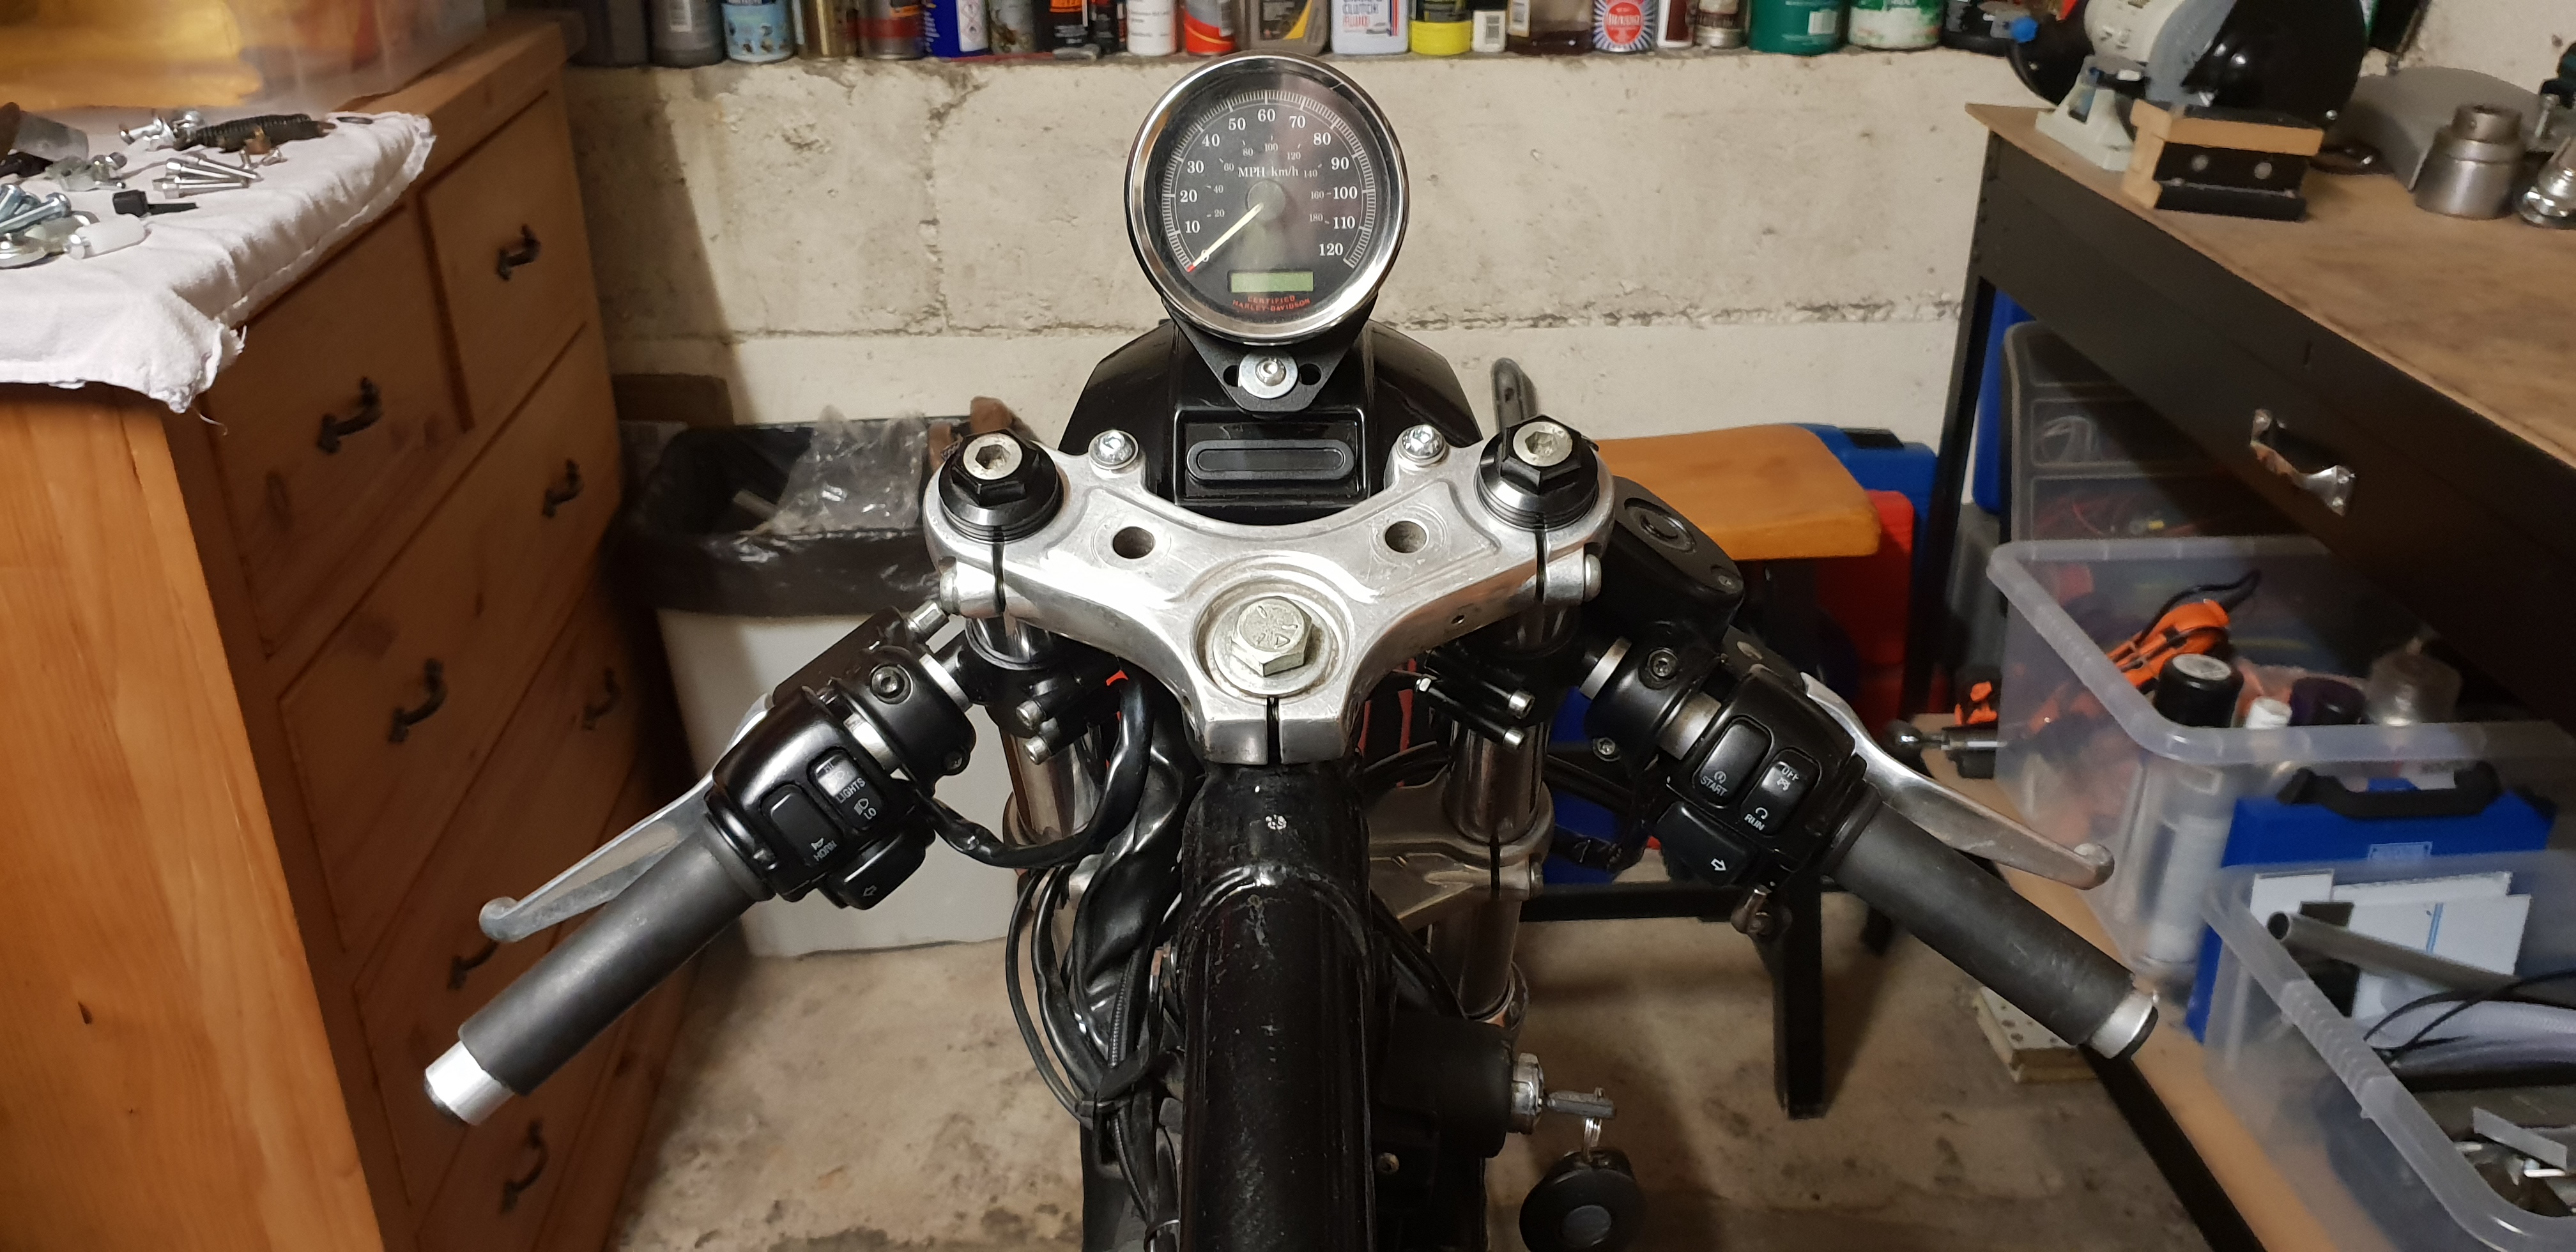
Aftermarket 1" diameter clipons were fitted to the 36mm forks, with all standard switchgear retained, except for needing to play round to make up for the lack of a recess in the new bars that is built into the right side of the standard item for the wiring. The resulting small gap between the switchgear and the brake clamp meant a small bolt head had to be super-glued to the brake light actuating stub at the end of the lever.
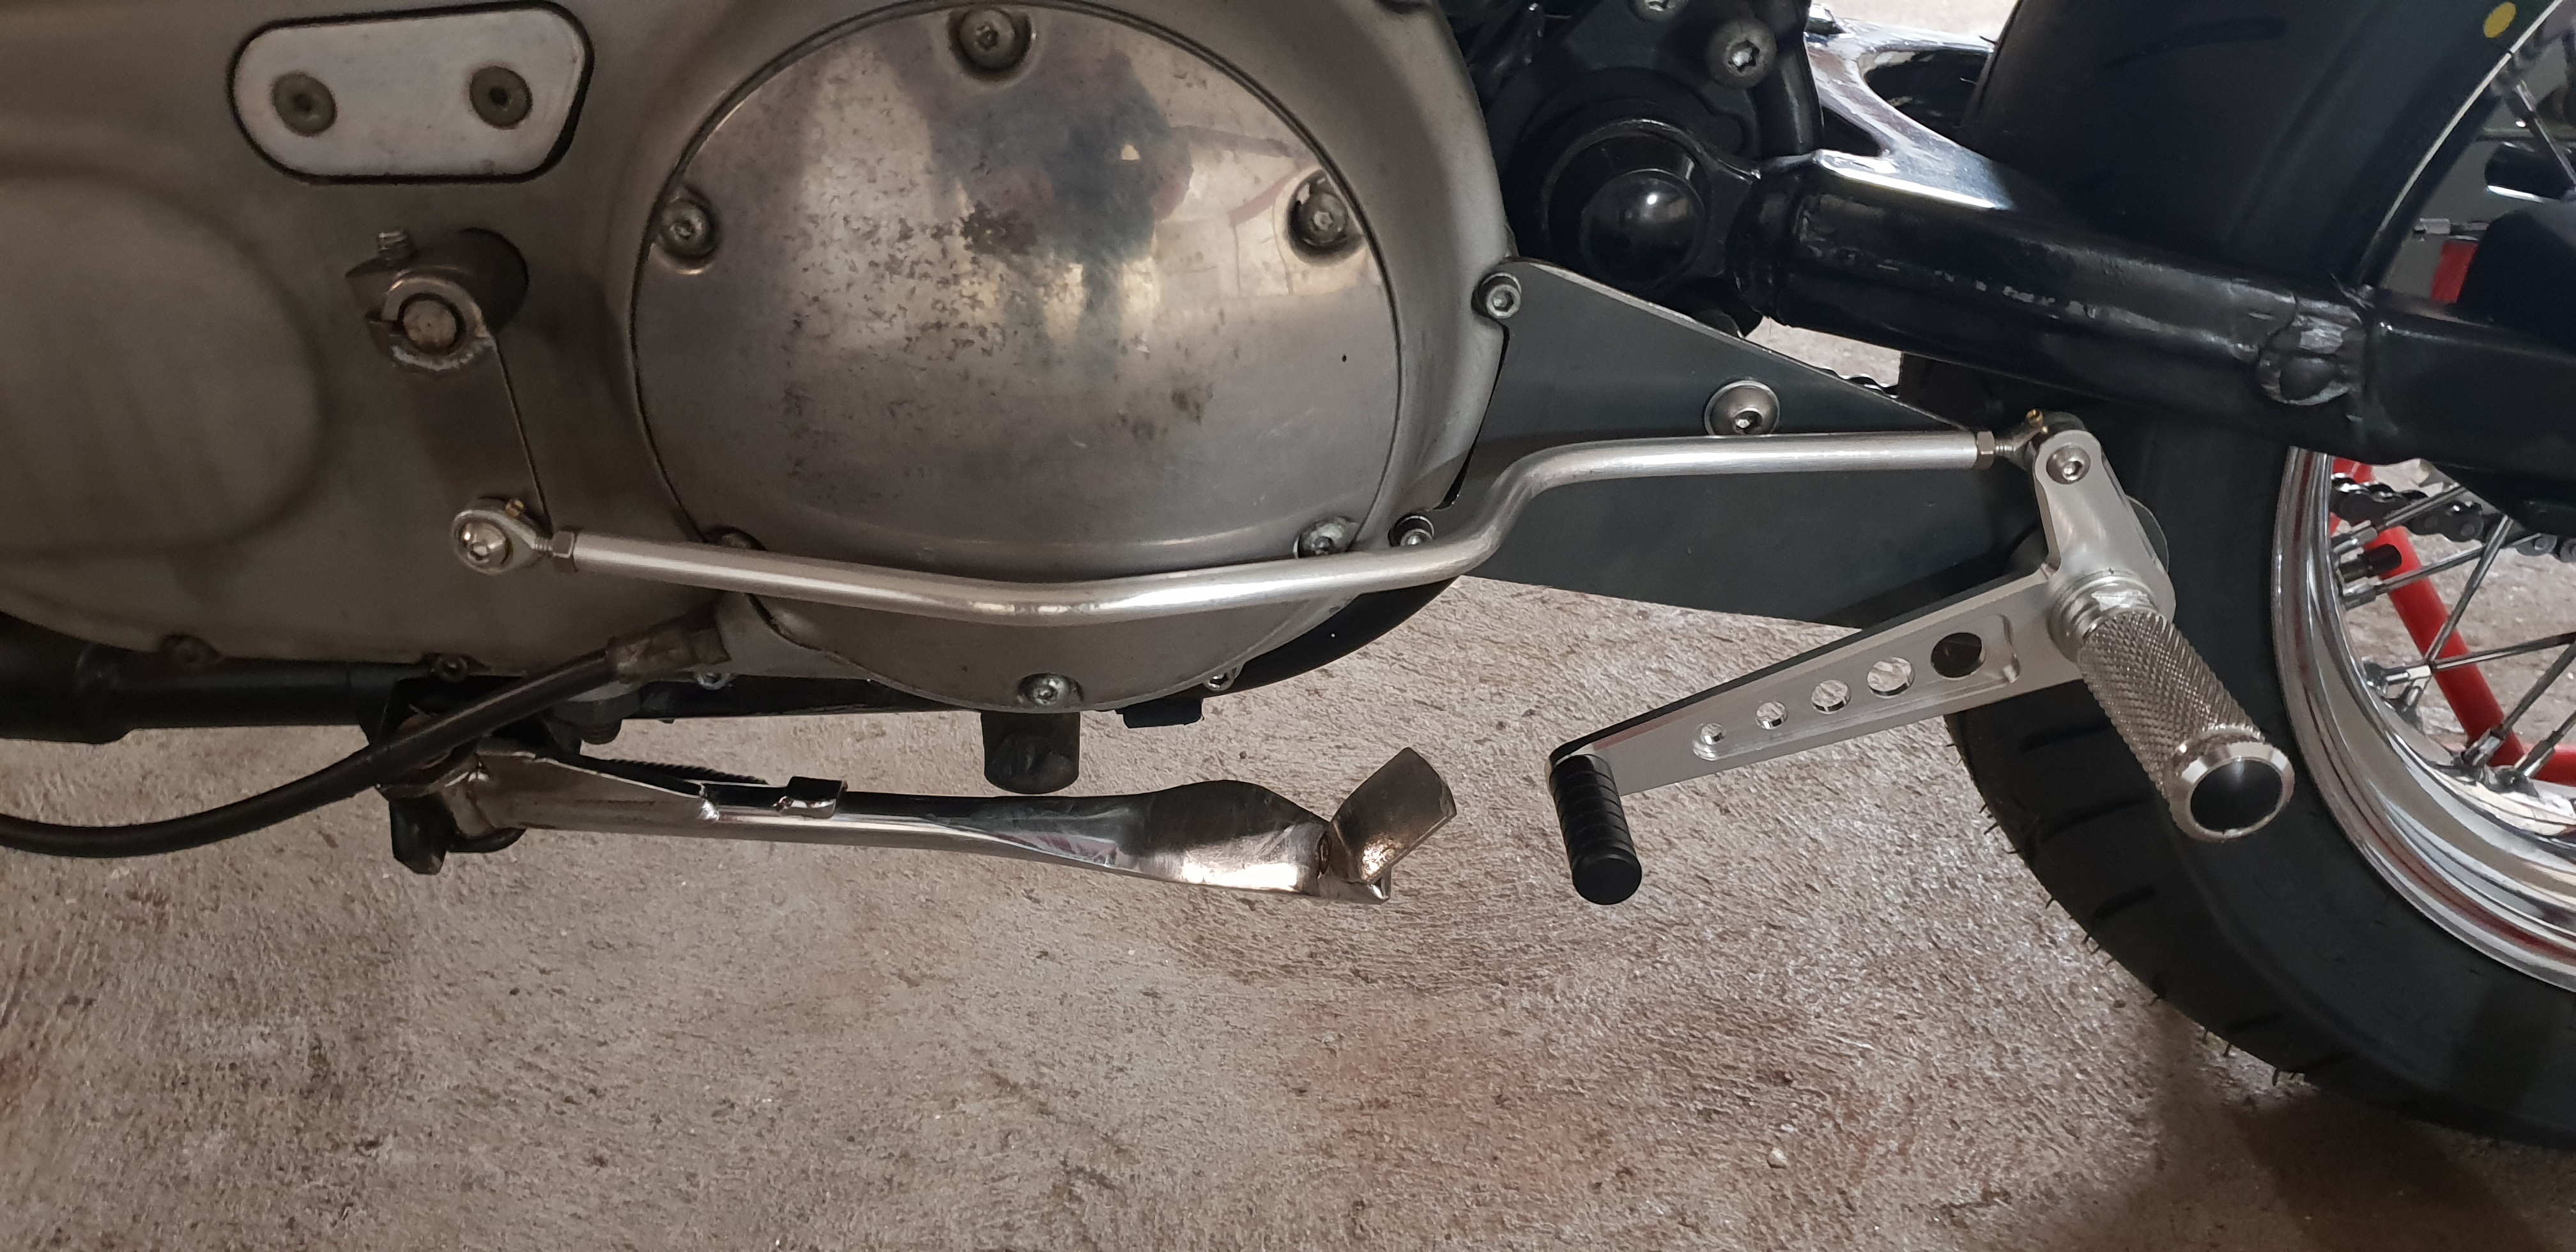
As for rearsets, I had seen multiple aftermarket solutions that all cost a small fortune (it's a Harley!) and didn't even look that good, so I determined to make my own. I fashioned plates in cardboard to get the rough position and size, the main determinants being the need for the gear change lever to fit behind the bulbous primary chain cover, and to use the redundant lower pillion footrest bracket holes for support. I then fabricated them from 4mm mild steel plate, and fitted inexpensive, aftermarket alloy footrests and levers. For the gearchange it took some playing around to fashion the lengthy connecting rod with the appropriate bends to circumvent the bulbous cover, attached at the front to a short stub welded to the splines from the original pedal. Meanwhile the massively over-engineered, original rear brake assembly was removed and replaced by a small, universal master cylinder bolted to the right-hand plate, using a hose bolt with built-in light switch. Braided hose was fitted to the original callipers front and rear, with standard pads retained, while making sure that Harley DOT5 silicone fluid was used.
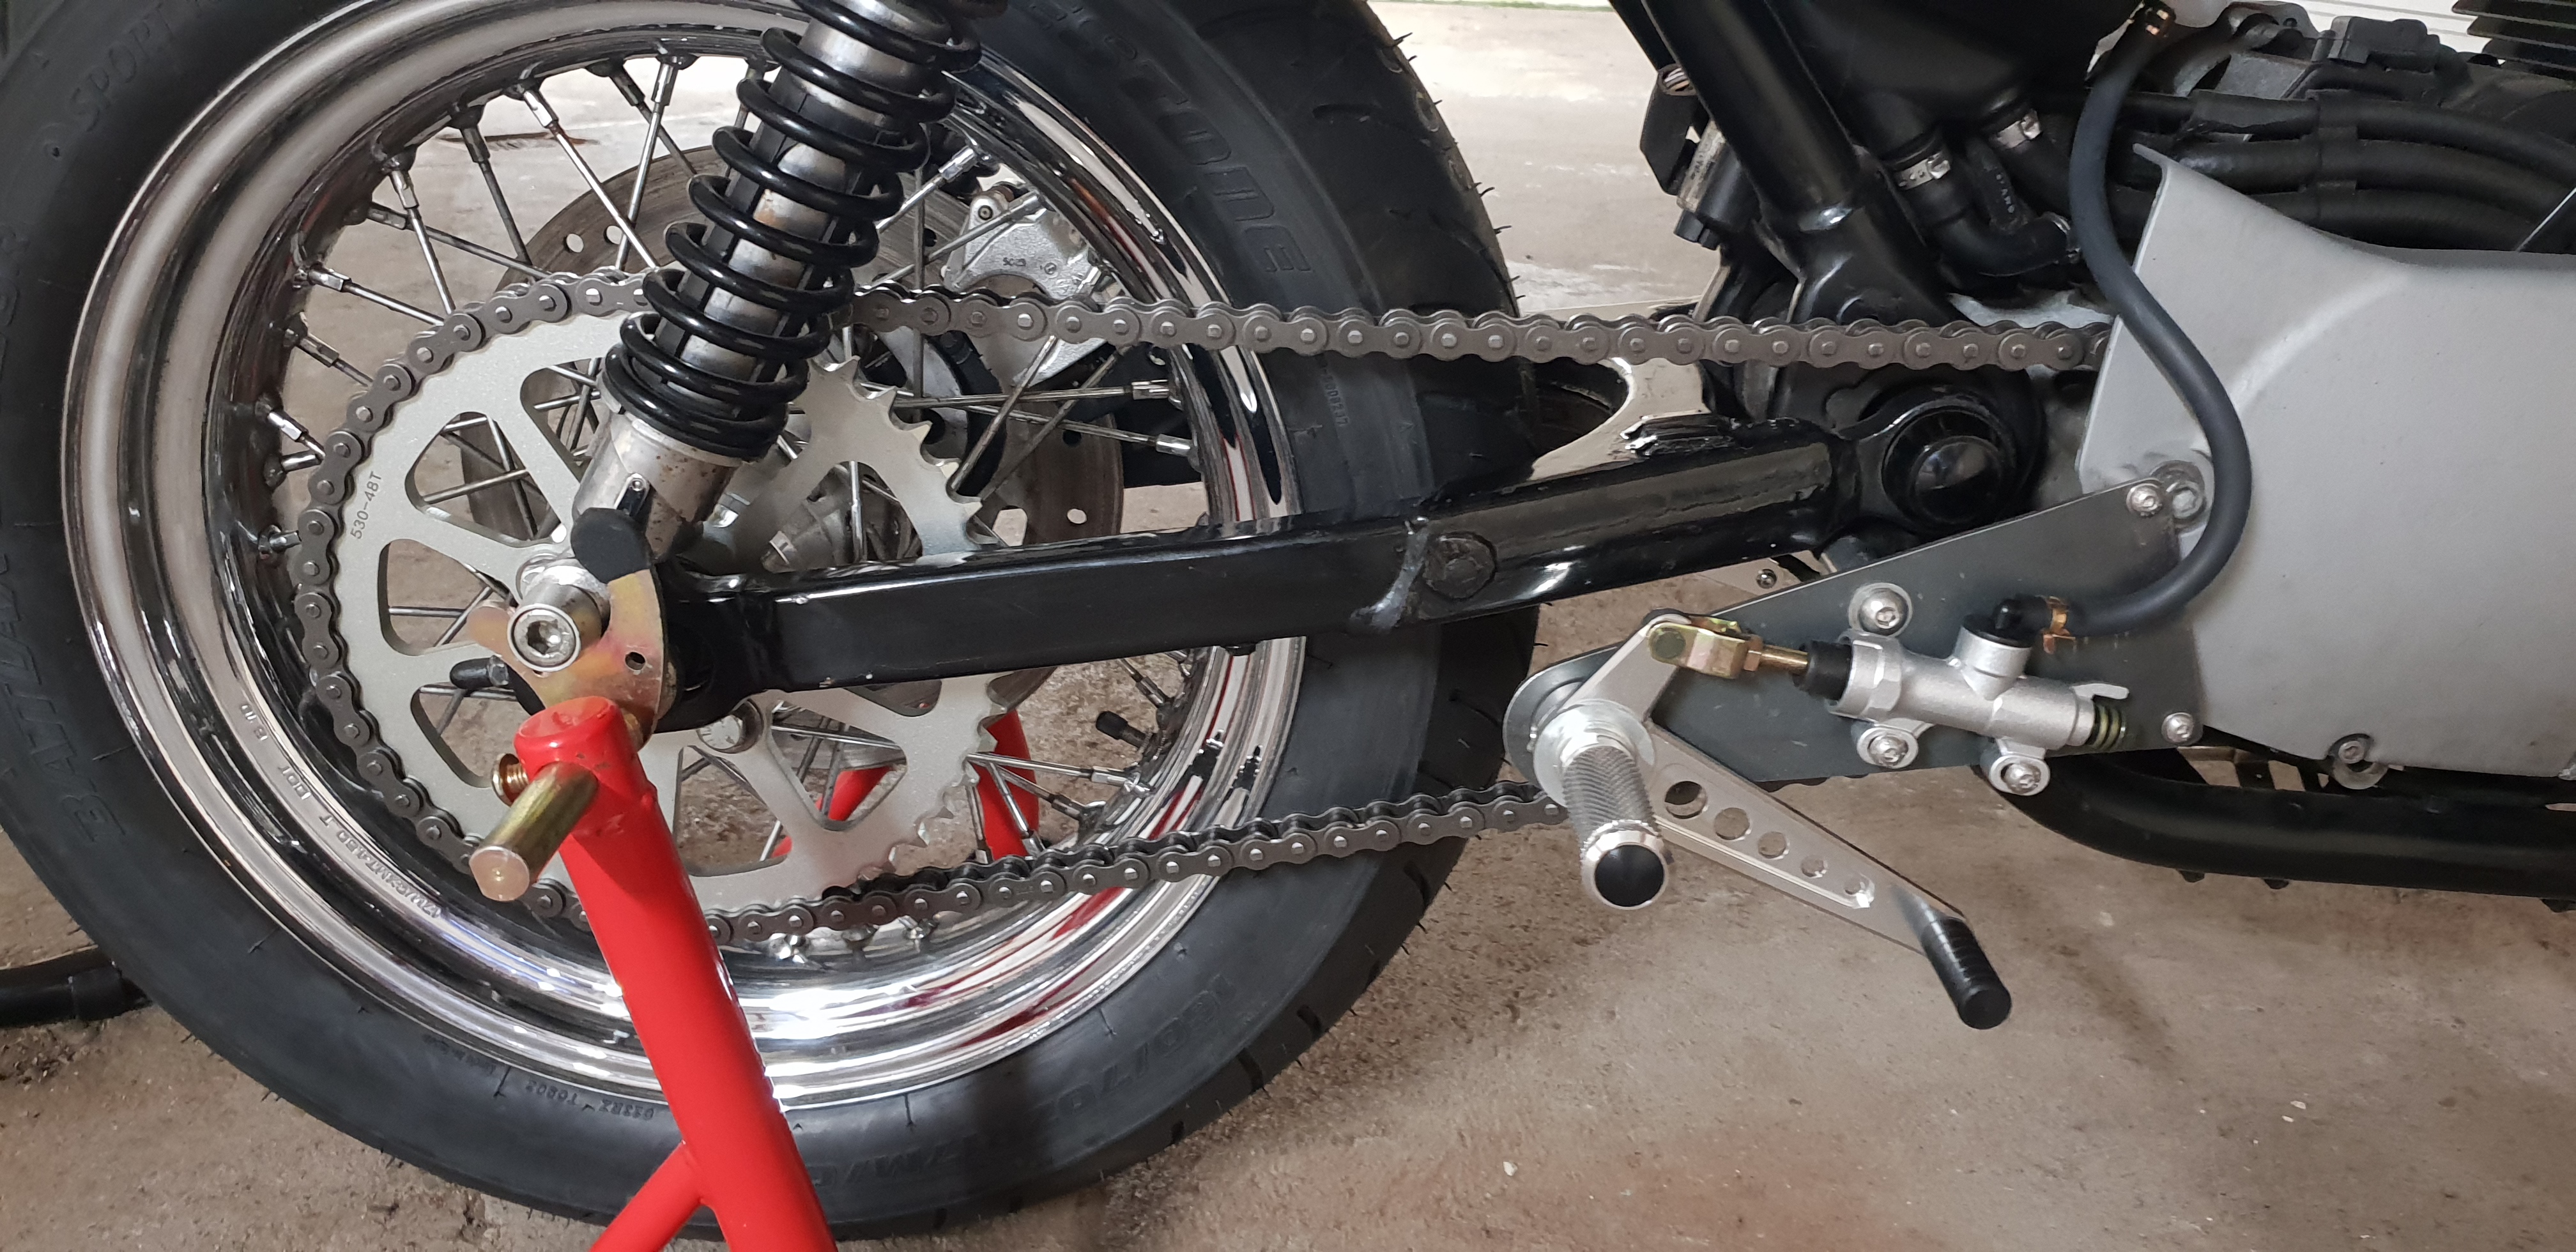
Final Drive
I didn't like the belt drive set up, it looked heavy and unwieldy and didn't fit the image I was going for. I managed to source a relatively inexpensive set of sprockets and spacers from the US, and separately a standard DID chain. The main problem was getting the old pulleys off, requiring my local tyre dealer to get his air gun on the nuts.
Electrics and Instrumentation
Electrics-wise everything standard was retained except for new LED indicators front and back, which annoyingly had to be mated to a resistor on each corner because the 883 doesn't have a separate relay, and a new, aftermarket rear light unit fitted into the seat. The warning lights had been bodged so were fitted into a proper mount above the headlamp, along with the front indicators at the sides and the speedo at the top (albeit after some drilling and playing around).
Bodywork
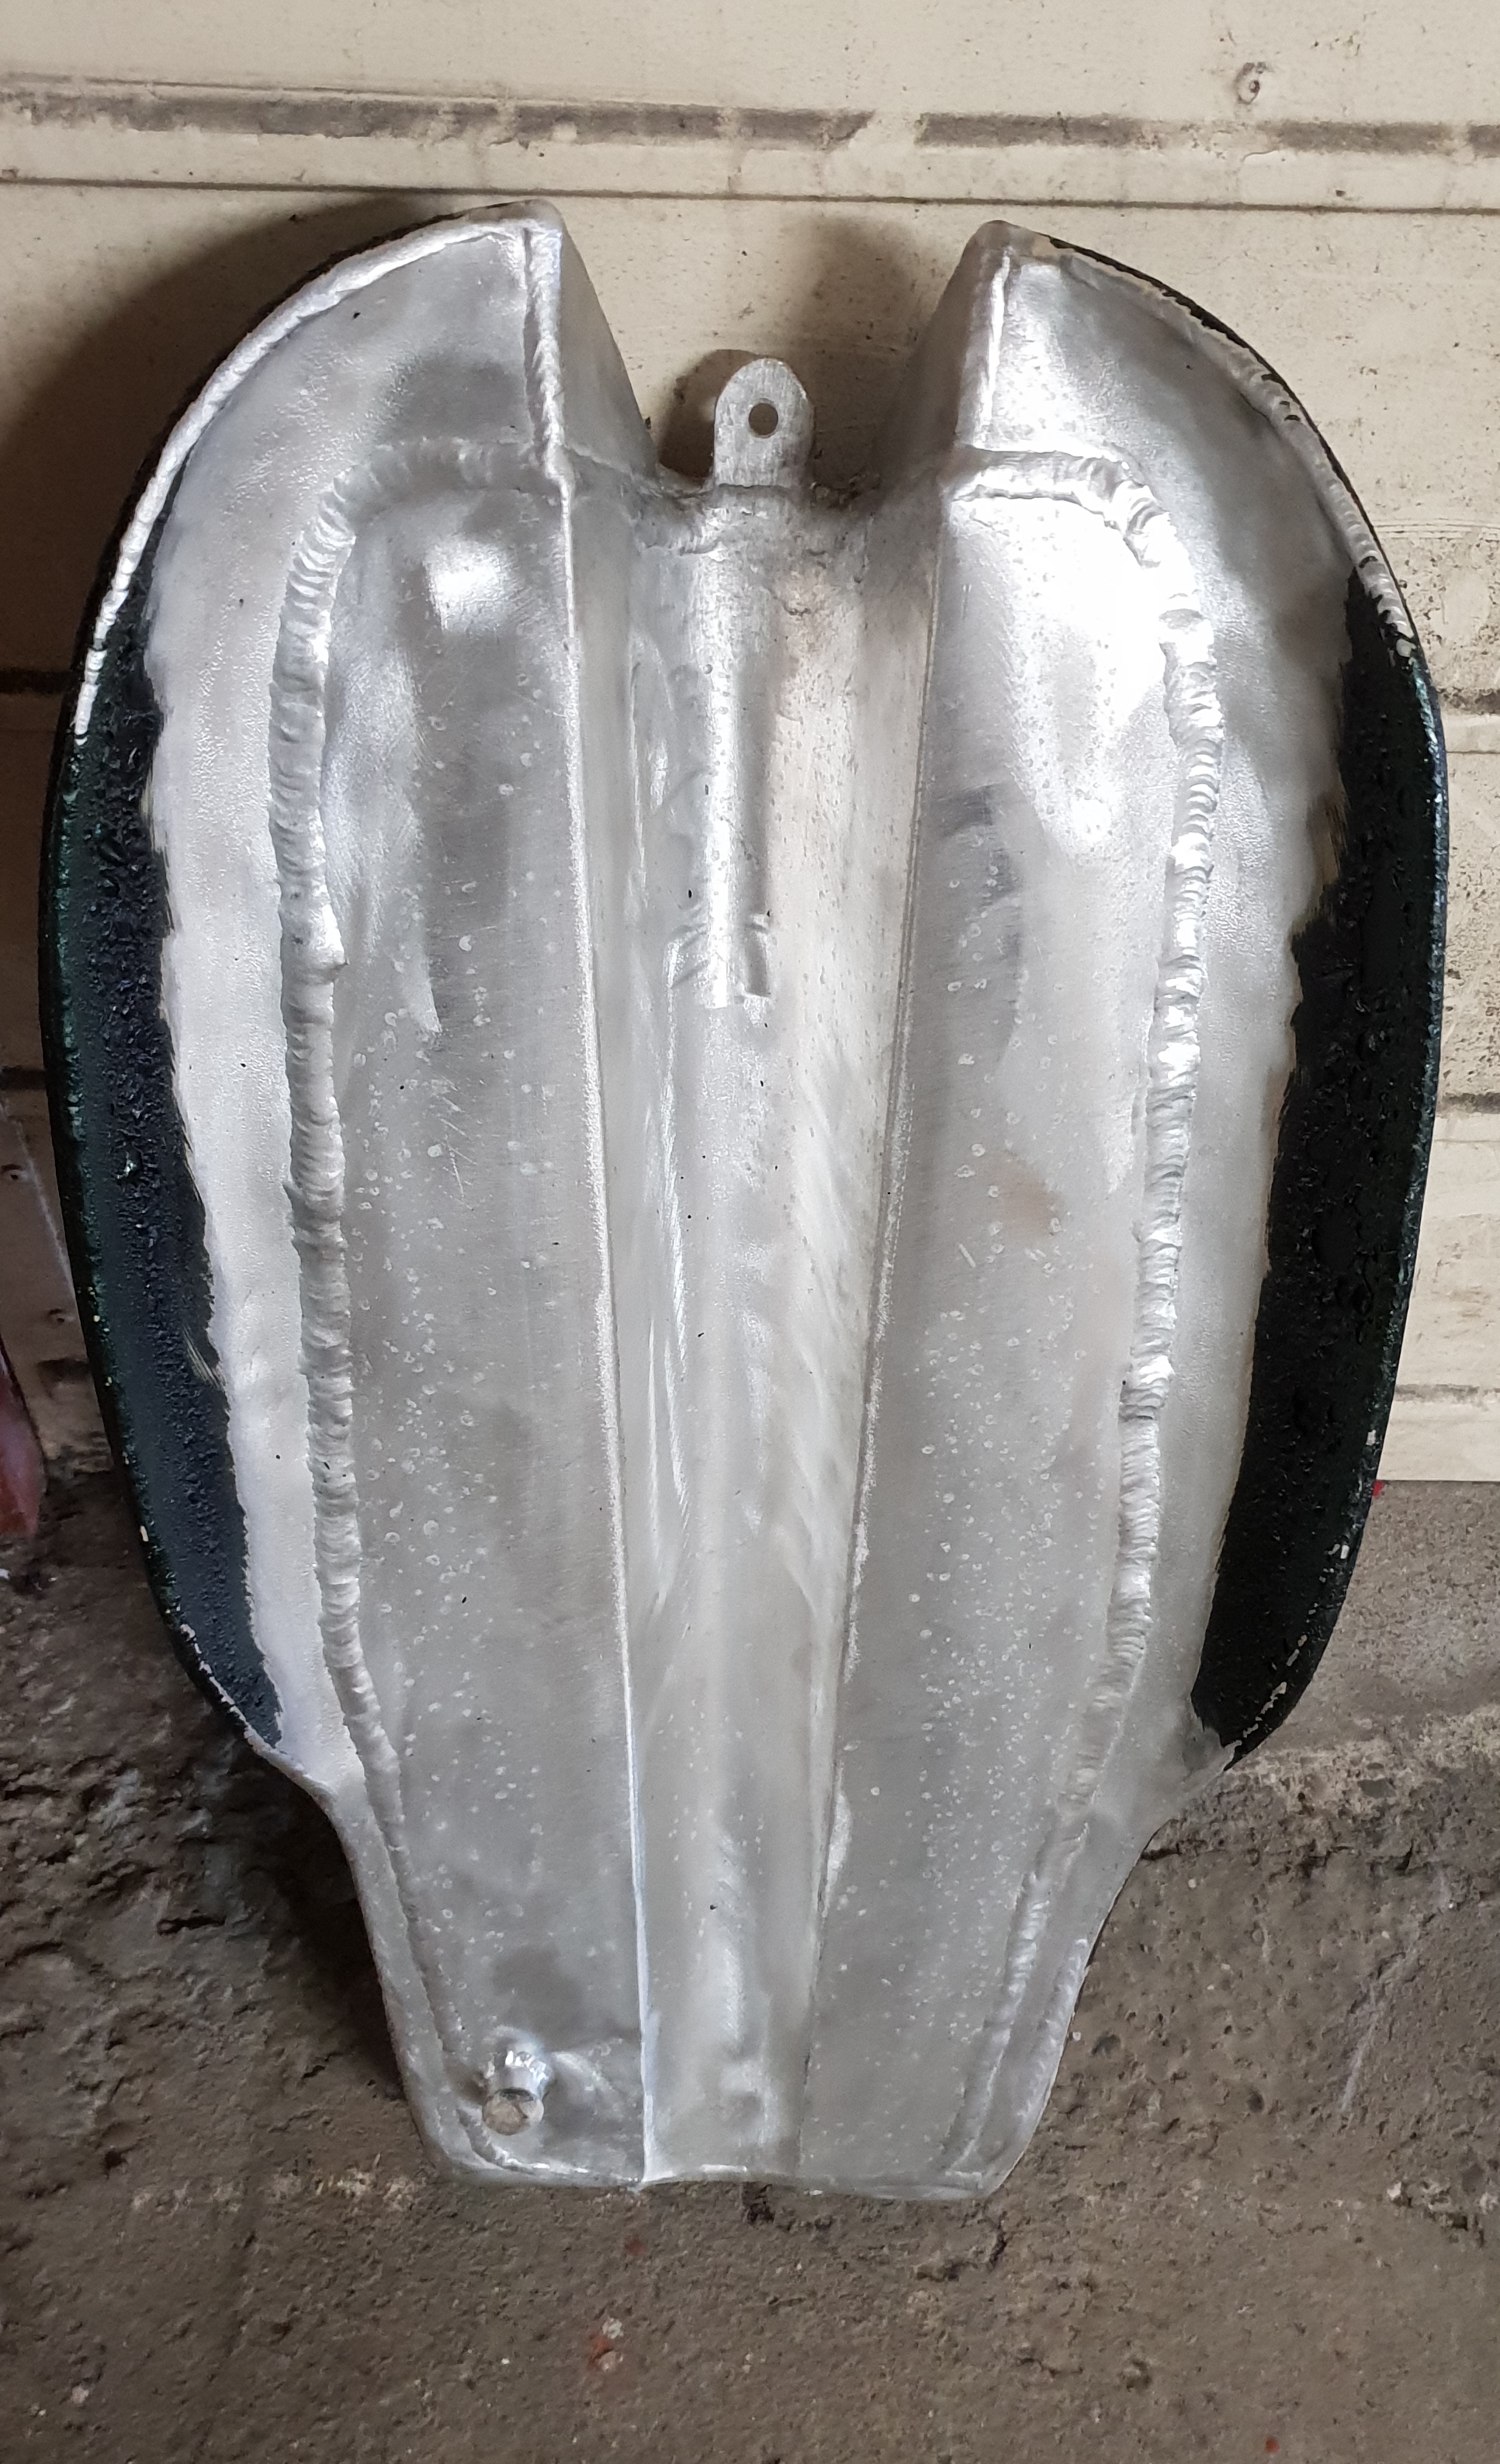
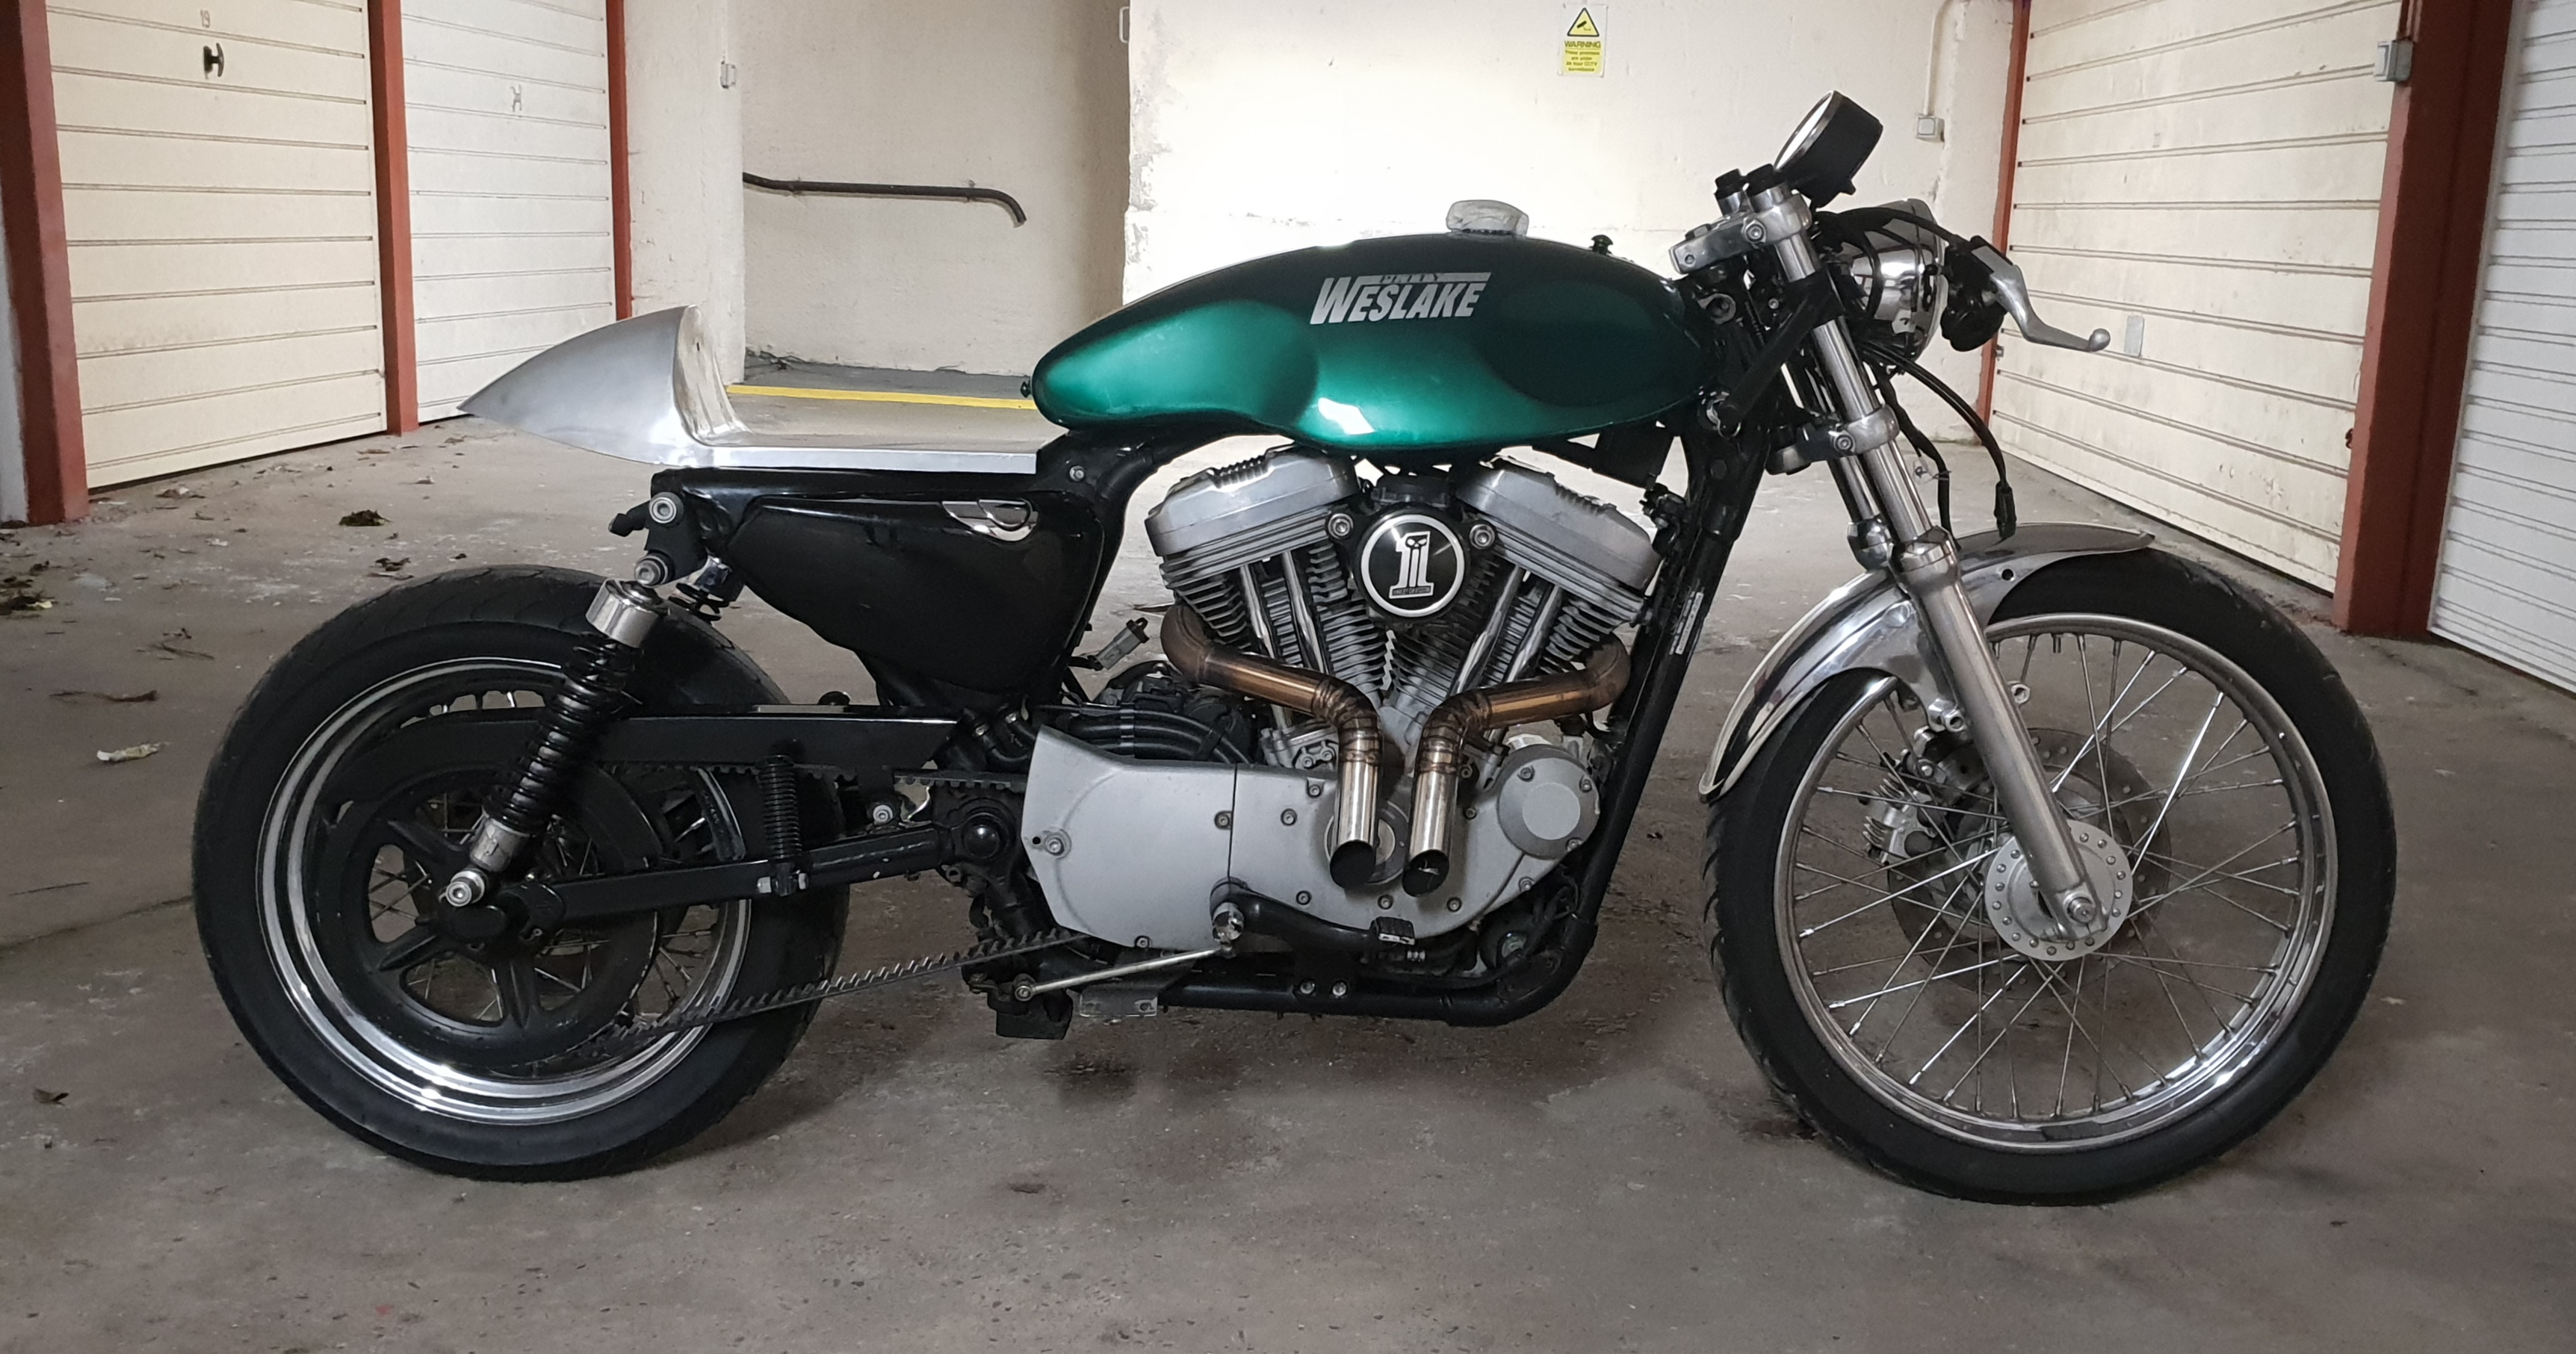
Luckily I found that the mudguard from my VX920 Yamaha would fit if I fabricated small brackets for the front, so I acquired a good second-hand version. The aluminium seat shape I was after was sourced from India via eBay and was surprisingly good quality. The difficult part was the tank, albeit that I was lucky to source an unused Lyta via Facebook that had been on the site for months and, luckily for me, not snapped up, despite a very reasonable price. But it was designed for a British twin and had a big square recess on the underside, whereas I needed it to fit the central spine frame of the Harley. I therefore cut the bottom out and mocked up what I needed using plastic drainpipe cut in half, attached with duct tape, along with a tab at the front to allow it to be bolted to the frame tube at the front. At the rear I retained the pegs for an elastic bungee cord wrapped undertneath the frame. It took me some time to position the tank and seat how I wanted them, because the tank sits pretty high on the frame, but in the end I found a combination I was happy with (the picture shows the original dark green tank). My tank-base design was then beautifully fabricated from a single sheet by a talented local welder.
The biggest decision was paint colour. I went through myriad combinations, from powder blue to light or dark green to yellow to Harley orange to silver to black. But in the end I settled on a dark gunmetal grey with an orange stripe, and I was delighted with the result. Just as well because the cost of the items themselves, the welding and the paintwork was hefty!
Suspension
This was kept standard except that to lower the front end I lifted the forks through the yokes by 2".
Air Filter and Carburation
I liked the aftermarket air filter already fitted, so all I had to do was replace the brokeen choke cable.